Aluminum Fence Installation Step by Step Guide
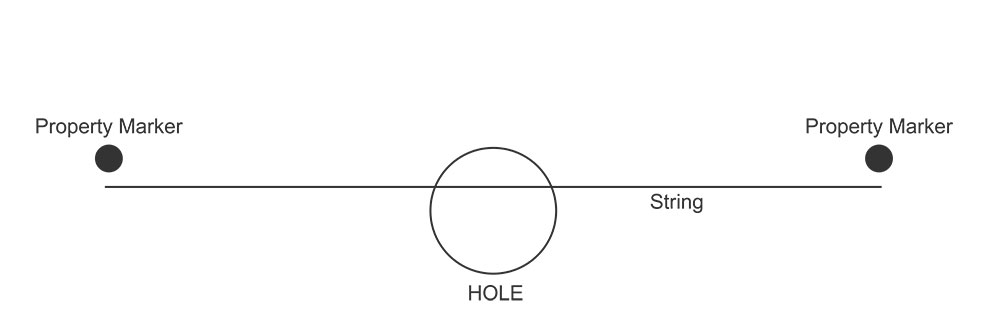
To begin, set your string line approximately 2″ inside your property line, as stated above. This material should be installed as you go (post/section, post/section etc.). The string line will be used as your straight edge.
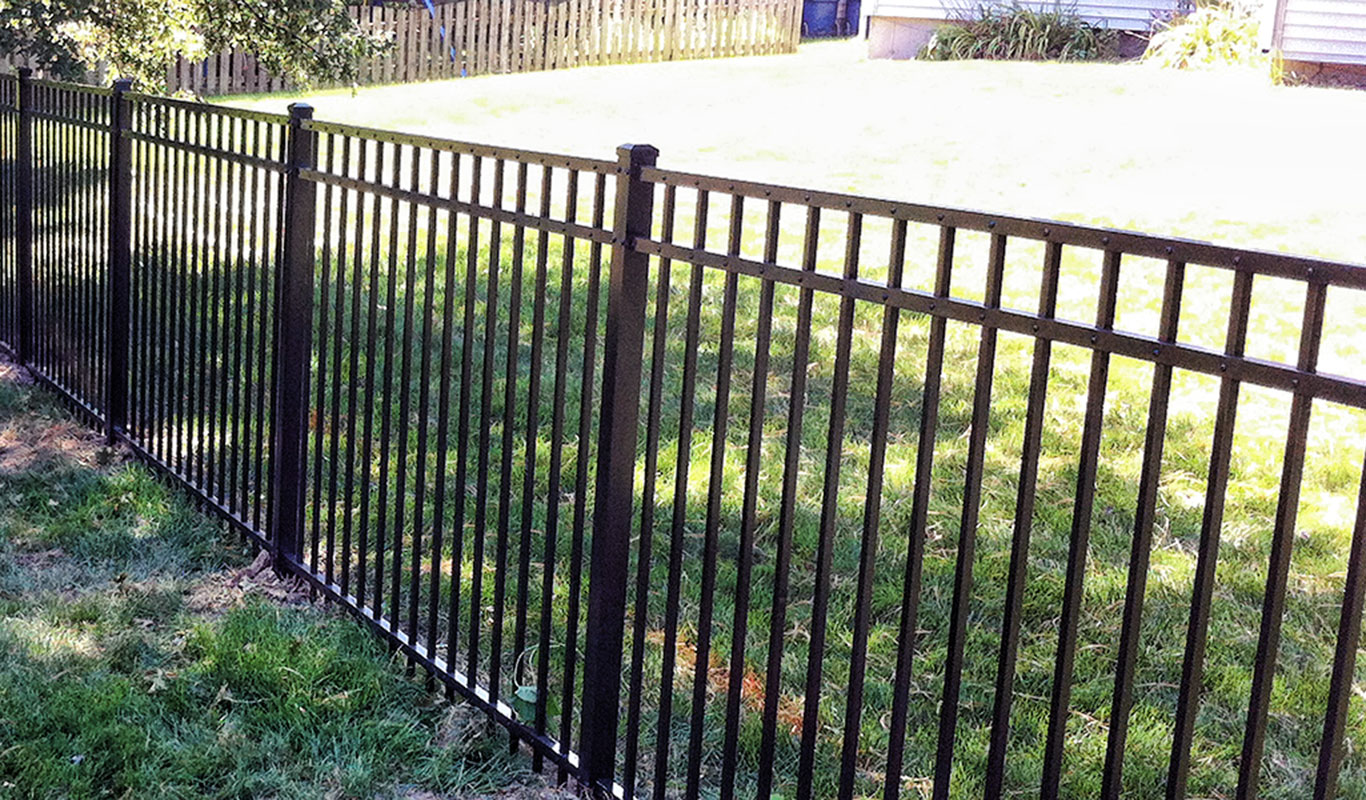
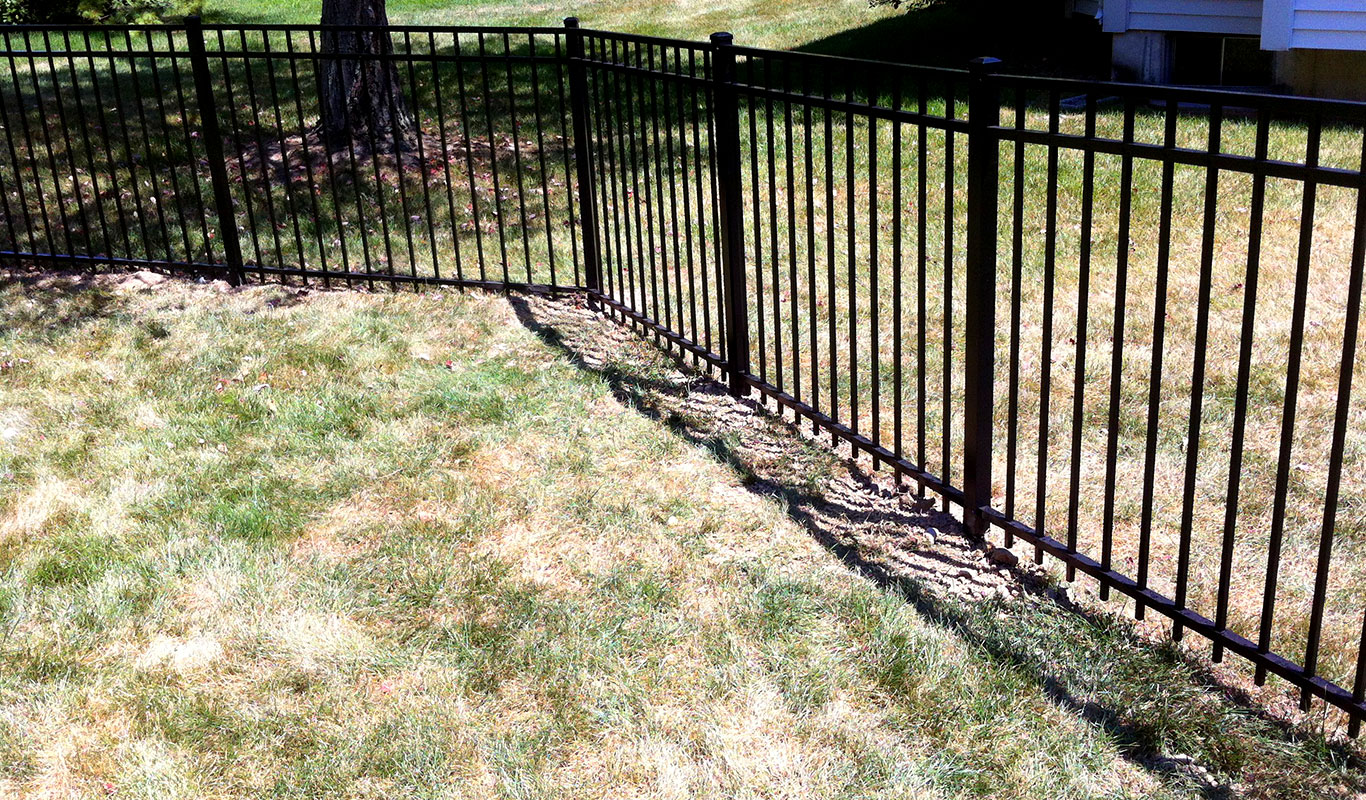
Mark out the location of the post holes (centers on residential are 72 ½”) along the string. Dig the holes 36″ to 42″ (depending on the frost line in your area) approx. 6″ in diameter. The holes should overlap the string line by approx. 2″(on outside) and approximately 4″-5″ on inside of fence (see diagram below).
This will help, while setting the post, to put the post as close to the string as possible without touching the string. Not touching the string is critical – if you touch the string at any point, the fence line will appear to bow when looking down the fence line. We recommend keeping the posts approximately 1/4″ off the string line while vertically level along the whole fence line. This will make your fence line straight.
Start by setting your first post in concrete and then insert the first fence section into the holes of the post. Drill a 1″ self-tapping screw into the pre-drilled pilot hole of the post through the section. Set the next post into the next hole, insert section, screw in fasteners to hold section to post and fill hole with concrete. We recommend leaving concrete approximately 2″-3″ below ground level and top-off hole with dirt. Pack firm and re-level post if needed, and continue down the fence line.
Once you have completed a single fence line, step back and look if any height adjustments are needed. If so, set the scrap piece of wood on top of the post that may be too high and hit it with the hammer until the proper height is acquired. Never hit a post directly with hammer without using a block of some kind as this could potentially damage the material.
If a post is too low, lift the post and place a block under the fence to hold the section up until the concrete sets. Next, go to one end of the fence and look down the fence line from one end to the other and tamp any post that is out of line. Due to material shifting around during the installation, it is normal to have to tamp posts when the line is completed. Make sure you set your height and tamp the posts prior to concrete drying.
Installing Aluminum Fence Gate Openings
The gate opening is the distance between the inside of the end posts (gate posts). The actual gate itself will measure less than the opening to allow for the hinges and latches.
The gate posts should be set just like the rest of the fence as described above. Many contractors will set the gate opening before installing any of the fences and adjust the height of the fence to adapt to the height of the gate to guarantee the gate will swing 180 degrees without touching the ground. After setting gate openings, continue to re-measure the opening and adjust if needed.
Once your gate posts are level and the concrete is dry, it’s time to hang your gates, and place caps on all posts. Use a rubber hammer to apply caps to tops of posts.
We recommend placing hinges on gate first. To do this, determine which way the gate will swing without hitting the ground (remember pool code if it applies). The hinges and latch will be on the same side of the gate. Lay gate down and screw hinges to the gate upright on the swing side only usually about 4″-5″ from both top and bottom of upright.
Next, insert the gate into the opening, at the desired height. You normally want the top rail from the fence section to line up with the top rail of the gate, depending on the slope of the ground. One rule of thumb is to make the fence look good on top and adjust the ground accordingly (trenching or filling in, etc.).
Once gate is at the desired height, use 1″ self-tapping screws to mount hinges to gate post.
Next, you should take the striker bar and mount it to the other gate upright while gate is hanging, usually about 5″-6″ below top of gate upright. Close gate and when the striker bar is about to hit the gate post, insert the catch. When gate is closed, this will hold the catch (already on striker bar) to the latch post for proper alignment. Screw the latch catch to the latch posts while the gate is closed, adjust tension of hinge if needed, then open the gate and let it swing shut on its own. If everything is lined up and working properly, put the remaining screws in where needed.